
How to Register a Payoneer Account: The Complete Guide for Freelancers and Online Sellers
In today’s global eCommerce and remote working economy, getting paid across borders quickly and safely is a top priority. Whether you’re a freelancer working on Upwork, a drop shipper selling on Shopify, or a digital entrepreneur running a global business — Payoneer is one of the most potent tools for receiving international payments.
This blog post is your ultimate, step-by-step, SEO-friendly guide on registering a Payoneer account, optimized for users seeking a fast, secure, and low-fee solution for global money transfers.
What Is Payoneer?
Payoneer is a global financial services platform that allows individuals and businesses to receive payments in multiple currencies, withdraw funds to their local bank accounts, or spend directly using the Payoneer Mastercard.
The top benefits of using Payoneer include the following:
- Receive payments from clients and marketplaces in over 200 countries
- Accept multiple currencies like USD, EUR, GBP, JPY, and more
- Low-cost international transfers compared to traditional banks
- Direct integration with major platforms such as Amazon, Fiverr, Upwork, Airbnb
- Fast and secure withdrawals to your local bank account or ATM
Why Register a Payoneer Account?
Whether you are just starting or scaling a business, registering a Payoneer account gives you:
- A virtual global bank account to receive local payments from international companies
- A secure and reliable method to withdraw funds in your local currency
- Access to a Payoneer Prepaid Mastercard to spend funds directly or withdraw from ATMs
- The ability to get paid by global marketplaces, networks, or directly from clients
Step-by-Step: How to Register a Payoneer Account
Here’s how you can sign up for a Payoneer account in just a few simple steps:
Step 1: Visit the Official Payoneer Website
Go to www.payoneer.com and click the “Sign Up” button on the top right.
Step 2: Choose Your Account Type
Payoneer will ask you how you plan to use the account. You can choose from:
- Freelancer or SMB (small/medium business)
- Online Seller (e.g., Amazon, Etsy, etc.)
- Affiliate Marketer
- Vacation Rental Host
Select the one that best fits your business model and click “Register”.
Step 3: Fill In Your Personal Information
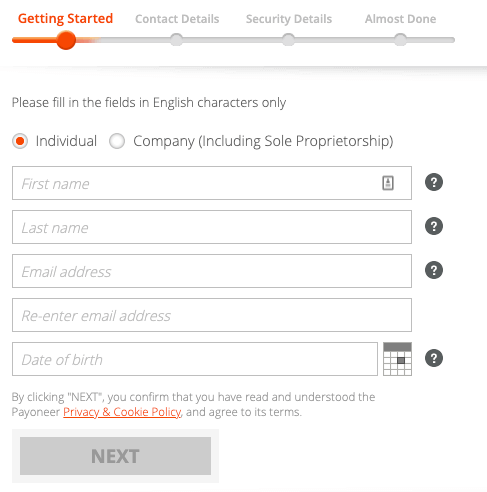
Provide accurate details such as:
- Full name (must match your government ID)
- Email address
- Date of birth
Click Next.
Step 4: Enter Contact Information
Payoneer will ask for:
- Your full home address
- Country of residence
- Phone number (you’ll receive a verification code)
Verify your phone number via SMS and continue.
Step 5: Create Your Password & Security Details
Choose a secure password, select a security question, and provide an answer if you need to recover your account.
Step 6: Add Your Bank Account

Add your local bank details for withdrawals. You’ll need to provide:
- Bank account number
- Bank name
- SWIFT/BIC code (if applicable)
- Currency of your account
This step ensures you can easily transfer your Payoneer funds to your bank.
Step 7: Verify Your Identity
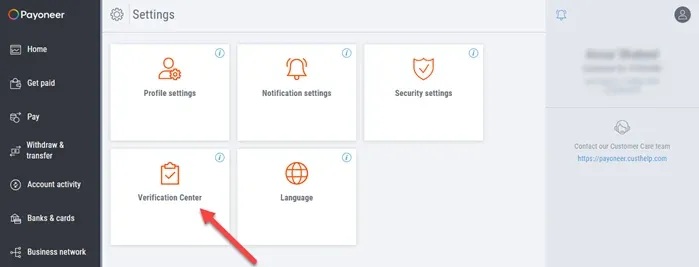
To activate your account, Payoneer may request:
- A photo of your passport or national ID
- A selfie for identity verification
- Proof of address (like a utility bill or bank statement)
Upload the documents directly on the platform. Verification usually takes 1–3 business days.
What Happens After Registration?
Once your application is approved, you will receive a confirmation email. You can then:
- Start receiving payments from international marketplaces
- Request a Payoneer Prepaid Mastercard (optional)
- Link your Payoneer account to platforms like Fiverr, Upwork, or Amazon
- Withdraw your earnings in your local currency
Tips for Faster Approval
- Use your real legal name and correct information
- Upload clear photos of your documents
- Use an active email and phone number
- Check your email regularly for approval updates or additional requests
Final Thoughts
Registering a Payoneer account is essential for freelancers, sellers, and digital entrepreneurs who want to get paid globally without high fees or complications.
With just a few steps, you’ll gain access to a trusted, secure payment platform trusted by millions worldwide.
If you’re ready to expand your business and simplify your payments, register your Payoneer account today and enjoy fast, global transactions made easy.
👉 Visit Payoneer.com to get started.
Additionally, Hac Ecommerce offers a range of comprehensive services designed to support and empower businesses operating in the POD (Print on Demand) industry. These services include fulfillment solutions, payment account rentals, and design cloning, all of which are tailored to meet the unique needs of entrepreneurs in this niche.